Here are just a few of my creations - I mainly make cards, but I've been known to dabble

Sunday, 23 February 2014

Owl Birthday Pop Up Card

Hi everyone, I think it's past time for an update (again, sorry about that long wait!).  I hope you're all doing well and having a lovely crafty time.

Today I'd like to share with you my first go at doing a pop up card.  I didn't have any fancy pop up dies or anything, all I used was good old fashioned scissors.  

My inspiration comes directly from this video by Darlene DeVries.  She did a great job with the card.  I had to improvise as I didn't have any party hat stamps or balloon stamps.  I instead made party hats by cutting a 2cm x 2cm square of paper, marking the centre at the top and then drawing lines from the bottom left and bottom right to the centre and cutting out the resulting triangle (hat).  To replace the balloons she stamped on the background, I attempted to make wallpaper and flooring.  It's a little rough, but for a first go, I'm pretty happy with it.  It has a heck of a lot of work involved and I decided to keep it myself!  I can use it as a prototype but really, it's so cute I just want to be able to look at it for more inspiration!  The owls are made with a StampinUp punch and paper pieced together.  Here's a pic of the punch and the final card I made.


Thanks for stopping by and having a gander!
Take care and happy crafting to you!

Saturday, 1 February 2014

Fluttering Fairy

Hi everyone, I thought I'd just pop in quickly and share my latest card creation with you.  This is a fairy from Whimsy Stamps that I fell in love with and just had to have - along with several others of course! 
Here is a pic of the wonderful haul that I got from Whimsy Stamps:
And that wonderful company included three free stamps (the red rubber ones) with cute sentiments that say: "I shut my eyes in order to see" and "Home is where the heart is" and finally "Summer memories last a lifetime".  Don't you just love freebies?  I sure do!
Anyway, back to the point (I know, I do tend to wander around the point sometimes)...  This is the first fairy I've played with from that order and I quite like how she's turned out.  I decided to step outside of my comfort zone and choose a different colour - and the winner was Green!  I don't use it much so that qualifies in my book.  I used a white cardstock base, stuck a green spotty panel over the whole front and then the panel with the fairy, which is mounted on a spellbinders die cutout.  A few gems and of course some clear wink of stella on the dress and stickles glitter glue on the wings and hey presto - a beautiful fairy.  The sentiment stamps are from Simon Says Stamp and I thought they fit rather well as the fairy is blowing...(I had to cut the little stars out, and now she looks like she's blowing out the candles, I think).


I also was rather lucky and received more happy mail from Lawn Fawn and an ebay store - which I highly recommend called Aunt Arabella.  Here are the goodies:

Well, I have been rather stuck, had computer problems this week also, but now it's working again and I hope it keeps working as I don't know why it stopped in the first place!  Computer withdrawal is not so much fun!

Have a happy, productive and crafty day!
Cheers

Sunday, 19 January 2014

Past Time For A Catchup I Reckon

Hello you lovely people, sorry I have been MIA again, I have been rather un-inspired lately and instead of making cards I've been doing a lot of window shopping and online shopping for crafty stamping products and watching a lot of youtube where other people are doing all the creating! 

I have a few new pics for you though, so lets get into it!

Ok, these two cards were made for a challenge on StampTV called Merry Moddy Christmas 2.  The link to the challenge has disappeared but a link to the entries for it is here.


I made this card for Liz, one of my StampTV friends as she sent me a special card to celebrate the season for 2013.  I really like how it turned out.  It is inspired by a youtube video tutorial by Robyn at injoystampin, which you can view in two parts here and here.

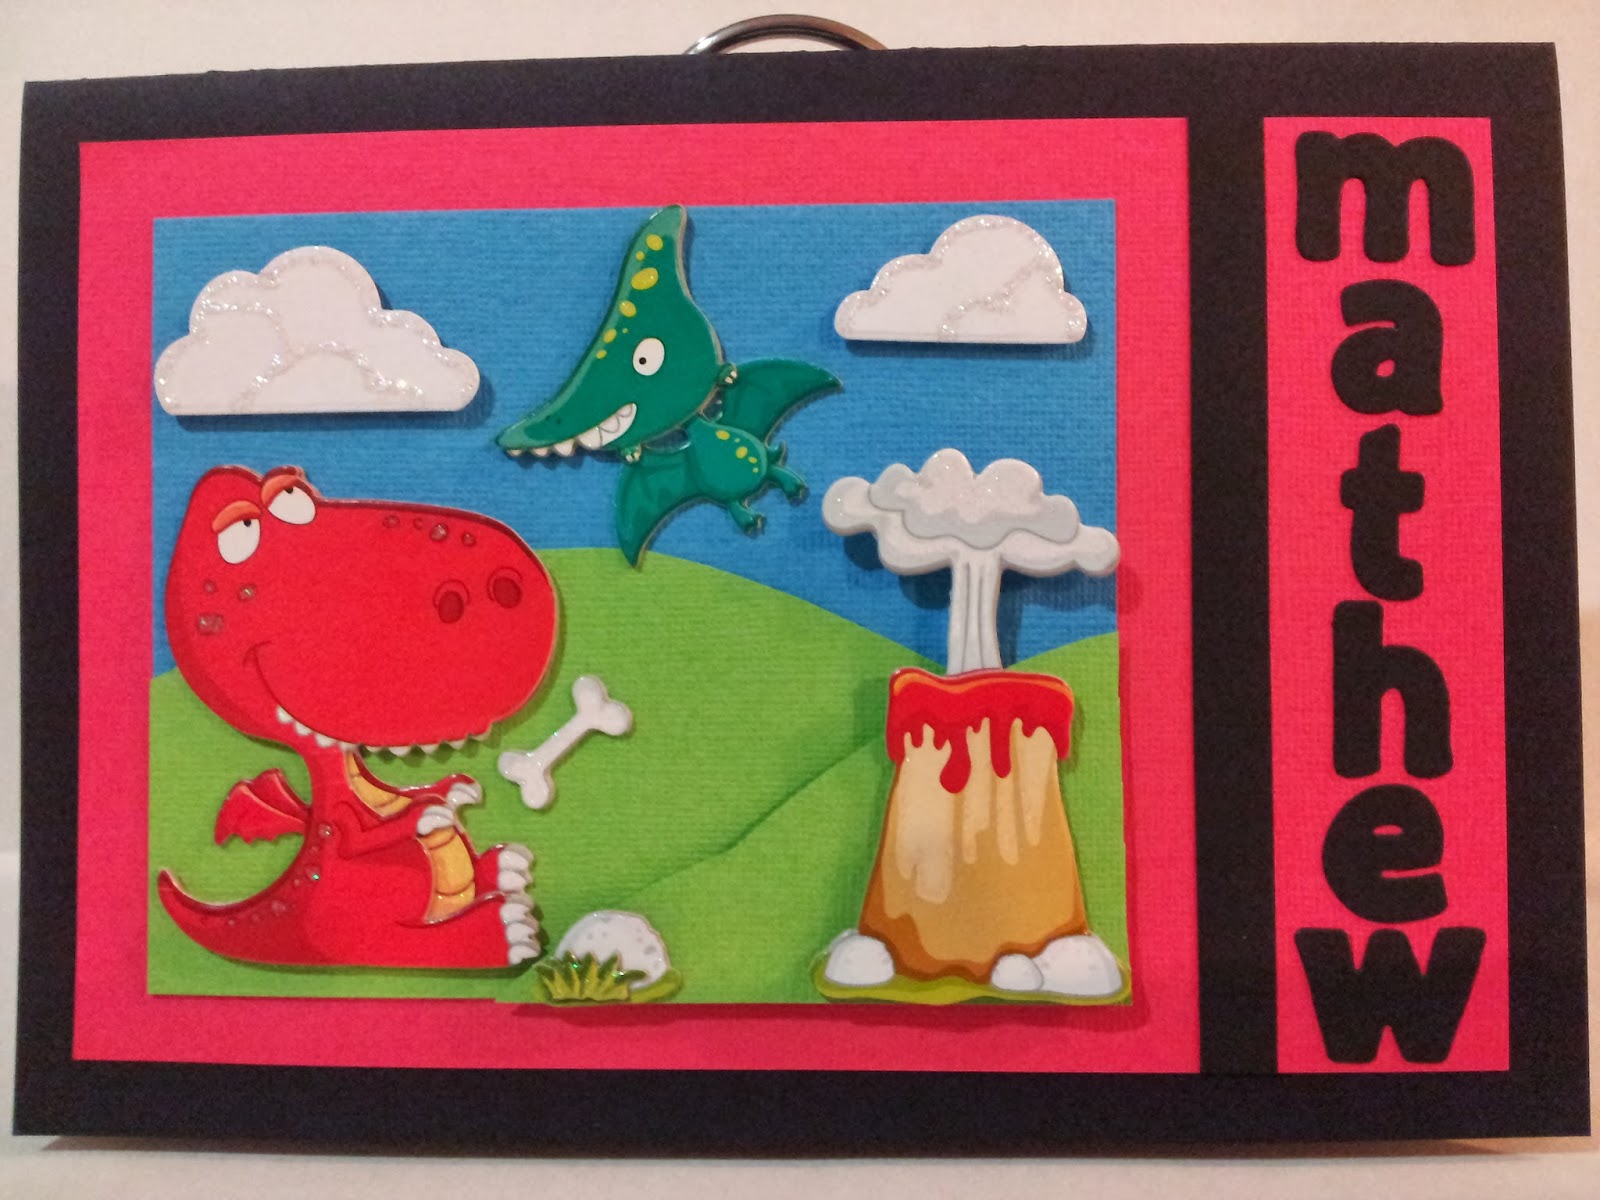
This card was made for my friend Carolyn's son Mathew, who was turning 5.  The dinosaurs and volcano dimensional stickers were bought from The Reject Shop.  I made the clouds and the hills myself though.  The second picture is of the inside, where I managed to fit the Happy Birthday.  Thankfully Mathew loved it!


With this next card, I thought I'd posted it previously, but it looks like I didn't.  It was entered into another StampTV challenge called Mix It Up Monday Dec 16 - Love is in the air!  To view all of the entries you can click here.
And guess who won that challenge?  Yep, me, I did, and they sent me this awesome prize!


And I think that about brings me up to date with today's card.  This image was sent to me by another StampTV friend called Virginia, who very nicely fullfilled my fairy stamp wish by stamping me a bunch of her stamps.  I really like the way this one turned out, but I have to tell you, the Spellbinders Dies that I used are called Elegant Labels 4 and my cuttlebug did not want to cut the outer one, it kept missing the top and bottom of the die. Oh well, I've now decided that it's almost time to upgrade because I want the largest dies, so I plan to get the Big Shot Pro hopefully around June 2014.

I tried masking the fairy image but I had the masking plastic sheet backwards so the sticky side was around the wrong way, lol.  My second attempt was much better and around the right way, but I didn't place it over the fairy properly and after attempting to put a glow around the fairy I discovered white spaces around parts of her that shouldn't be there.  I went around her with a black fineliner, which looks alright I guess but next time I will need to be more careful.
And this picture shows how glittery the fairy is with clear wink of stella pen all over her.  I also coloured the white panel under her with the pen, twice and it went super glimmery - like glitter cardstock without the texture!

Well, I hope you all have a lovely crafty day and until next time, take care!

Regards and thanks for stopping by!


Tuesday, 10 December 2013

Julie is having a baby!

Hi there, another quick post for you.  I've just finished making a card for a lady called Julie who works in our Brisbane office branch and is soon to be a mum for the first time!  She's going on maternity leave soon so we needed a card to farewell her, I hope she likes it!

I thought I should do a close up so you can see the sparkly wink of stella in clear - I love that stuff!

Well, it's late (12.01am) and I have work tomorrow, so I'd better choof off to bed!

Goodnight and thanks for stopping by :o)

Sunday, 8 December 2013

Feeling a little bit like blue is a lovely colour

Hi there, sorry it's a been a while, I've been busy with work and all that entails and I've been watching a lot of other people on youtube making cards, instead of making them myself!

I've been really loving blues at the moment and felt the need to make a blue card.  I had the base and the greeting and finally I found some really nice paper pads from Crazy Clarks and The Reject Shop and now my cards are finished.  (I made two the same).

I hope you like them! The first one is the outside, the second is the inside, the third is the card & envelope together.


Take care, until next time!
Cheers
 

Sunday, 17 November 2013

Holiday Card Workshop 2013 - Day 2 - Card 1a

Hi everyone, here is another installment of card making inspired by the online card class that I'm doing.  

This card really excited me when I saw Jennifer McGuire's videos, I never, ever, EVER would have thought of doing this without being shown so I am forever grateful for joining the class for learning this technique.

The theme for this card was to use your dies in different ways.  Rather than layering them up, you can make them a flat kind of jigsaw/inlaid design instead, which could be great for reducing those postage costs!

I made two attempts at this technique, mainly because my first attempt was a total failure! lol... I got the pieces mixed up and whilst I could get everything lined up on my desk, sticking it down did NOT work.  Have a giggle at this!  I have no idea where I went wrong with it!


For my second attempt, I decided to simplify things and not include the leaves part.  I do miss the colour it provided but am really happy with the fact that it all came together.  It's a bit boring but the technique is there and I can improve upon it with practice.  I ended up recolouring over the copic marker on the flower with a wink of stella red brush and it's really glittery now.  Jennifer's card featured that new wood paper (thin sheets of wood) and looked gorgeous, so it would be interesting to try this with different kinds of materials.

I thought that it still needed something, so I added a few pearls to the centre, I first coloured them with red copic markers to match the focal image.  The Merry Christmas cutouts are also left over cut outs from last year, done with my silhouette cameo cutting machine.

Thanks for stopping by, I'd better go recheck the lesson plan pdfs to see which card I'm going to attempt next!

Cheers
 

Holiday Card Workshop 2013 - Day 1 - Card 3a

Hi again everyone, I hope you are doing well.  I've done another two cards for the workshop, once again split into two different entries.

Please visit online card classes if you want to check out the other classes they have going and remember, you get lifetime access to the course content when you sign up for one!

Ok, this card is inspired by (copied from) Joy Taylor, you can click her name to visit her blog for more inspiration!

The card Joy did included a large die that cut out falling stars so I needed to think outside the box again as I don't have that die and I really like what I came up with.  I had some previously cut out snowflakes from last christmas (done on my silhouette cameo) and they finished it off nicely!  The lesson was on using both the positive and negative parts of die cutting.


Thanks again for stopping by and visiting my blog today.  I have another card to post so look out for that one too!
Cheers
 

Friday, 15 November 2013

Holiday Card Workshop 2013 - Day 1 - Card 2a

Hi again from stormy Queensland!  It's been a rather stormy week here, luckily nothing has interrupted my creative flow and I have here another card made as a result of my online card class.  I am so glad I signed up for this class, I'm learning a heck of lot.  We've had two classes already and I'm way behind.   But luckily I have the weekend now so hopefully I'll catch up, lol.  For more information on these classes, please visit Online Card Classes.

This wonderful card was inspired by (copied from) Jennifer McGuire.  You can view Jennifer's own blog right here.

It features a 'Z' fold, which I've never done before (and hadn't heard of either for that matter!).  And whilst i didn't have a die to do the 'tinsel' I love how I thought outside the box and wrapped silver twine around (after snipping some triangles out of my 'triangle tree') - oh I have a pic of that too!  I didn't have a background stamp with christmas messages on it so I used an unmounted stamp set from Purple Onion and put adhesive onto my acrylic stamp block, stuck the stamp set to it and stamped that with white pigment ink instead.  Worked a treat!  The sequins were bought to decorate a free tree die I got from Australian Simply Cards but it worked even better here!

I'll put a picture of the whole card here as well as a close up shot of the tree as I like it so much. *smile* 


I hope you enjoy my latest effort, and thanks again for stopping by for a visit!
Cheers
 

Wednesday, 13 November 2013

Holiday Card Workshop 2013 - Day 1 - Card 1b

Once again, here is my second card made at the Holiday Card Workshop 2013 which is available along with many other classes at Online Card Classes.

I hope you enjoy!  This card was inspired by (copied from) Kristina Werner - for more inspiration you can visit her blog here.


Thanks again for looking!
Cheers

Holiday Card Workshop 2013 - Day 1 - Card 1a

G'day all, as previously promised I can now share with you that I'm doing the Holiday Card Workshop 2013 which is available along with many other classes at Online Card Classes.

We had our day one workshop and I have created two cards from that workshop.  I just worked out that I need to separate my posts so that I can enter more often at the online card class.  I can't share any details with you on how the cards were made other than the pictures, but suffice to say - that it was money well spent!

It's already got my creative juices flowing and I can't wait to get started on the next card - just have to sort out dinner and then I'm set.

I hope you enjoy!  This card was inspired by (copied from) Kristina Werner - for more inspiration you can visit her blog here.


Thanks for stopping by!

Christmas Cards Weekend (7)

Hi everyone, just a quick note to show you the cards I made this weekend.. I was unusually productive and made 7.  I didn't write down all the items I used but most of them are fairly self explanatory.  I will say though that the green christmas card with the golden flower features metallic crepe paper that I put through my xyron sticker machine - it has this gorgeous texture, I love it!


I had the most fun creating the two tri-fold cards, and I'm sure I'll be doing more of those in the future!

I'll be back real soon as I started an Online Card Class so be prepared for a lot of new creations!

Thanks for stopping by and paying me a visit!
Take care